Pages

Wednesday, November 8, 2023

Fabrics Store Phoebe Tank in a Black Linen - Great Capsule Item


This is my first garment made with a fitted pattern and muslin. What a rewarding experience! I   downloaded the free Fabrics Store Phoebe Tank PDF pattern as my first capsule item. 


Fabrics-store.com Phoebe Tank

The muslin took quite a bit of time and each revision required a change in the original pattern. I did have to make lots of adjustments, but nothing fits me off the rack and I get tired of altering garments.


My muslin which fits me perfectly!


I have fallen in love with linen and since I live in a warm climate most of the year I can wear it almost all year round. It was a great beginner pattern as it is just a slip on top with easy binding to attach to the neckline and armholes. 

My finished tank in a medium weight black linen fabric


I wore it to my annual American Sewing Guild Meeting - it goes well with almost anything in my wardrobe. Also wore my new hat which is a Belfy Italia Cara Summer Fedora. 

All ready to go - can't wait to see the other ladies ensembles!


So what did I learn from this lengthy experience?
  • Gotta have a muslin(s) to ensure a good fit - no shortcuts and take your time.
  • Pre-wash your linen - I use the Sandra Betzina method you iron it first on high heat with a dry iron to set it, use a little detergent and wash and dry twice at hottest settings, and remove it from the dryer when it is almost bone dry. I then ironed it again prior to cutting it out. I didn't iron the tank after wearing it and moving it around and the wrinkles are minimum.
  • Used 2.5 stitch length.
  • Be sure to stay stitch the armholes and neckline prior to attaching the binding.
  • Make sure you use a bias cut binding to ensure it will adjust to the curves.
  • Pulling threads to achieve a straight grain line pain with this particular linen - it wasn't the highest quality but it served as my linen muslin.
  • Utilize your mentors - they will save you loads of time with their experience base.


Friday, December 23, 2022

Finished Geeky Bobbin Arctic Vortex Tree Skirt Poncho

 I'm finally posting the completed poncho. What a fun project! It's a little large on me, but very warm and fun. 


Talk about fun - notice the geeky accessories? Built  a pair of  coolie moolie light sabers in Orlando with my significant counter-nerd, Dr. T - on our anniversary! It also fits in well with our new Star Wars themed tree. Had so much fun creating ornaments from every geeky Star Wars item we could find. We sourced some 1980's Pez and retrofitted with screw eyes which would perfectly! A fun holiday time - we are having.

Merry Force Be With You!

Monday, November 21, 2022

Week 7 Geeky Bobbin Arctic Vortex Tree Skirt Poncho

 Decided to quilt with Kikochan (my Babylock Sashiko) - so I quilted the sashes and fussy cuts. Next step is binding and ties. I'm running behind, but I will finish so stay tuned.


A little hard to see, but it is quilted around the fussies.


I got up close and personal with Kikochan and had no issues with my Sashiko 2. Can't wait to use her on a jacket.

Tuesday, November 8, 2022

Week 6 Geeky Bobbin Arctic Vortex Tree Skirt Poncho

 The magic happened this week when I assembled all the vortexes and fitting triangles. Coolie moolie! The colors really pop with the star wars characters. No issues, but I did have to be careful to ensure they were in the right order. What do you think?


I am pondering what quilting designs to use. I am passing on the batting so it will flow easier so that should lighten the task. 

Stay tuned for the quilting reveal with the awesome backing fabric.

Wednesday, November 2, 2022

Week 5 Geeky Bobbin Arctic Vortex Tree Skirt Poncho

 Made my first set of setting triangles ever!!! I have used 60 degree angles to quilt handbags with criss- cross lines, but not for quilt piecing. Trimming the corners as I did with the vortexes really helped line up the pieces for assembly. I can't wait to assemble the quilt top. I am going to mix up the vortexes and setting triangles to see what the best color combo is. Then make my decision if I'll change or go with the original design that I printed out. 


Stayed tuned for the assembled top. Now the fun begins! 


Tuesday, October 25, 2022

Week 3 and 4 Geeky Bobbin Arctic Vortex Tree Skirt Poncho

Vortexes created! Wasn't sure of the colors but I think they look great together. Clipping the corners with the triangle template really helped move the piecing along. 


Looking forward to sewing the 12 setting triangles. Time to sharpen those scissors to prep for all those 60 degree angle cuts - woo hoo!


Thursday, October 6, 2022

Week 2 Geeky Bobbin Arctic Vortex Tree Skirt Poncho

I pre-washed and starched (with Mary Ellen's Best Press) all the fabrics in preparation for the big cutting session. I already owned the Creative Grids Stripology Ruler and it was my first time using it. I really like the tools and techniques Geeky Bobbin recommended. I watched the video on cutting strips - followed it and had no issues. The pattern directions were great so cutting the substrips went fairly quickly - it was just a chore to track all the sizes. The 60 degree cuts were difficult - I'm so glad the pattern provided great pics of the completed angle cuts. I also own the Creative Grids Angle Finder ruler which was awesome. I then used the Template for fussy cutting to trim the corners. All in all it was the most extensive quilt cutting session for me to date. But I learned ALOT!


Prepared and ready fabrics are.

I'm geeking out with my Star Wars fabrics and excited to start sewing Vortexes.


Friday, September 30, 2022

Geeky Bobbin Arctic Vortex Quilt Along

 I took a wonderful zoom class last year with Geeky Bobbin and discovered their quilt alongs. I missed this one last year, but it is back again - woo hoo!!! I'm signed up and going for it creating a Star Wars Arctic Vortex Tree Skirt aka poncho. Check out the link below to sign up. We are on Week 1 and I have my fabrics and coloring sheet (included with the pattern) completed.


Here is the link to sign up:

Geeky Bobbin Arctic Vortex Quilt Along

Check out Geeky Bobbin on Instagram with pics of the tree skirt and poncho.

Geeky Bobbin on Instagram

My scissors are all sharpened up for Week 2 - Cutting Fabrics.


Thursday, June 11, 2020

Tim Holtz Air Mail Satchel Tote Bag and Coin Purse

Love making handbags and totes. This tote is so boho-chic and fun. Very time consuming with all the fussy cutting. Notice the metal tag on the front - something I found in my stash.


Love the pony beads on the back of the bag. And first time try at rivets - coolie moolie!


Inside pocket for my phone, etc. and designed the matching coin purse which hooks in since the top only has a magnetic clasp.


Moving on to some smaller (not fun) clothing upgrades, repairs that have been sitting and waiting on me. Then I'll decide which long term project to start next. I have a couple of MN quilts in the queue.

Monday, July 23, 2018

Pink Sew Together Bag Plus Bonus Link to Tutorial

One of the accessories to my Pink Professional Tote Bag is this handy Sew Together Bag. 


Don'tcha just love the happy pinks?


The bag was intentionally designed for sewing accessories and everyone seems to think the bag has one purpose. But everyone was so surprised and excited when I explained I use it as a wristlet handbag to store my personal items when I attend sewing classes, meetings or any other outings. It actually fits perfectly in the bottom of the Professional Tote Bag. And I have carried it separately as just a wristlet. Multipurpose - coolie moolie!


I really like the bag handle which is constructed as an extension of the zipper.


The best part of this bag is that you can use up all your scraps from other projects to make a matching bag. Love it!!!

The bag is fairly easy to construct. My only concern was when you sew the border on the side and "lay down the pockets" during construction - just had never done that before - no probs once I figured it out. 

Things to note:

- I used Decor Bond to firm up the bag, I have seen it quilted and unquilted, but I like the firmness of    the Decor Bond - you just have to remember to iron, iron, and iron it to get a good set.
- I used 3 different fabrics on the inside pockets which gives it great personality.
- The inside pockets are a tight fit for credit cards/IDs but mine do fit.

BUT AS PROMISED, I found a link to a great tutorial for this bag Sew Together Bag Tutorial.  It is broken down into 5 days as the owner of a quilt store and pattern store and zipper store all coordinated to provide a class. I always print out my tutorials and spiral bind them for ease during construction.

BUT WAIT THERE'S MORE! I also found a pattern for a Mini Sew Together Bag where the pattern maker coordinated with the original Sew Together pattern maker to sell a worksheet where you can calculate a smaller bag. Here's where you can purchase the worksheet for the mini sew together bag: mini sew together bag worksheet  And here's the tutorial from OPQuilt:  mini sew together bag tutorial

All in all, a cute little bag with lots of possibilities.

So scissors be sharp and fabrics be trim as you conquer the Sew Together Bag projects!

Monday, May 7, 2018

Pink Professional Tote Bag

How about another coordinating item to add to my travel sewing machine? This was my second Professional Tote Bag. Although this is not an easy tote to construct, it is just wonderful for carrying items to and from my sewing activities. Did you notice my name tag/badge I created for my ASG meetings? If you look closely enough you can see the ASG reference next to the scissors - coolie moolie!


I also included the travel strap which I omitted on my last Professional Tote and it works perfectly with my Tutto sewing machine carrier.


The side pockets are perfect for carrying water bottles to quench my thirst during all that hard work.


For those of you who aren't familiar with the pattern, here it is:

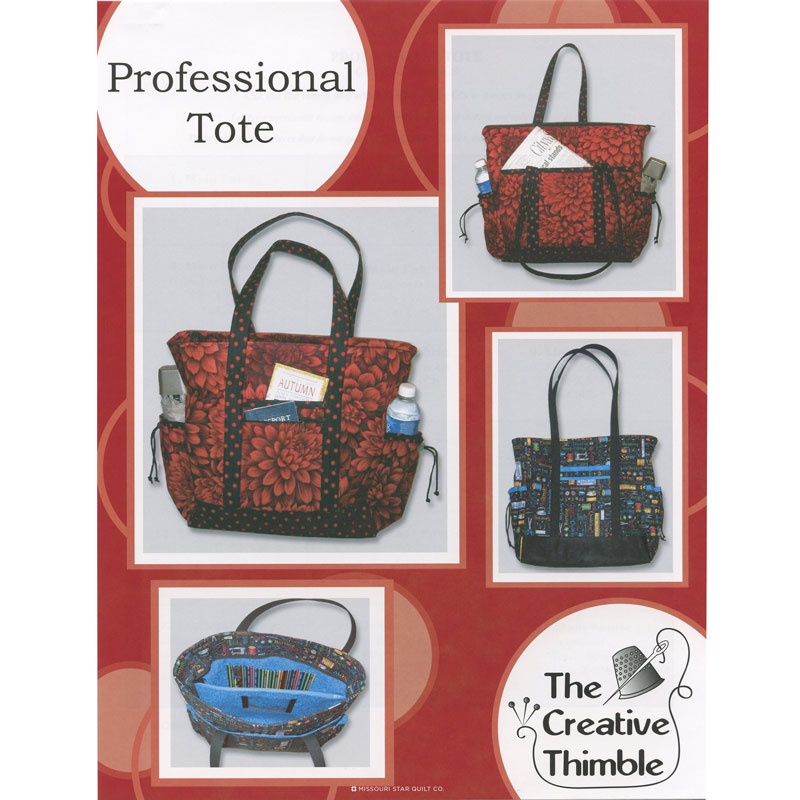
Professional Tote Pattern

Want some helpful tips in creating this tote?

- I have seen many color configurations of this tote, but I prefer the bottom, trim and straps out of a dark contrast to the lighter patterned bag body
- I used Pellon Decor Bond and it takes forever to bond it to the fabric. Take your time and ensure you have a good firm bond or the result will be wrinkled
- Don't be afraid to modify the pattern to meet your own specs - I have changed interior pockets, removed the interior zippered pocket on both totes and constructed it with and without the travel strap
- The old rule of always purchasing a little extra fabric absolutely applies here - you can easily create coordinating items for your tote - how great are matching little bags, sewing accessories or other items?
- If you plan on matching the fabric patterns on the front and back remember to purchase extra yardage to make it happen. I like to match if at all possible - even the travel strap above is matched.
- Take your time and realize that this is not a fast and easy tote. I sew it in sessions, with breaks in between each to avoid mistakes. I talked to some women who have made multiples of this bag and can sew each bag in one session, but that is not me. So I accept it and don't let it discourage me. Plus it's fun to enjoy the journey.

Anyhoo, have fun and be prepared for all the "oohs" and "ahhs" you will receive when you strut your stuff with this functional and gorgeous tote.

So what's next? I'll be posting my coordinating Sew Together bag next. So keep a sharp lookout for the next scissors session.


Wednesday, December 6, 2017

Space Invaders Geek Gone Wild Mini Professional Tote Bag

I've had this fabric since I created my son's diaper bag for our darling granddaughter, who is 5 now. Don't know if you remember, but here's the link to the post: Space Invaders Diaper Bag. After coveting that bag for years I decided it was time to make my own, and I love it! The mini tote was just as complex as my larger zombie tote, but I love the smaller size - yeah babee! Just right for a tote, or small handbag to show off to my fellow nerdos. And it's still gonna work for me as a fashionista bag. So what do you think?


I had fun again matching all those little aliens on the front, back and side pockets. But match them, I did!


Don'tcha just love the inside Geek fabric?


Added a key fob fussy-cutting the little nerd head - nyak nyak!


 Moving on to some smaller projects and this crazy holidaze phase! Isn't this a great time of year!


Monday, November 20, 2017

Zombie Professional Tote Bag

Zombie and Professional????? yeah, babee! I don't like boring projects - it took me a zeptosecond to pull out my Riley Blake Zombie Apocalypse fabrics. Hope you luv the results as much as I do. The front has a great little zippered pocket.


I have talked to oodles of folks who have sewn this bag (Professional Tote Bag Pattern by Creative Thimble.) One lady told me she has made 20 of these! Coolie Moolie! Here's the back  featuring a nice large pocket.


Did you notice the fabric on all the pockets matched the base tote fabrics? Was a little extra work, but if you scroll back through my posts at the Space Invaders diaper bag, matching the fabrics makes all the difference!

f


And don'tcha just luv the zombie eyes fabric in the lining? I even utilized the Riley Blake ribbon from a fat quarter set for a key fob. The other side has a cute fussy-cut pocket.


The pattern includes an interior zippered pocket.


 Well, I'm off to another tote bag project. The pattern consists of many steps, but there are some great learning opportunities with the bag construction.

So, dig in your stash and find that unusual fabric that's just waiting to transform that usual application from boring to spectacular!


Thursday, August 31, 2017

Digitized Folk Art Wristlet with Guitar Strap

When you digitize your own designs the possibilities are endless - take a look see at my new handy wristlet - functional yet colorful.  I started with this initial graphic (antique patterns) which is a great public library with oodles of patterns.


I used fabric from my stash and purchased the swivel hook hardware with my handy dandy Joann's coupons, so it was very inexpensive.


I used multiple hoopings (2) for the strap, and the canvas was a bit challenging as it becomes thick at the seams, but I just love the final product. It's functional - large enough to hold my phone, cards, etc., right-sized- not too big, and very fashionista - embroidery is in right now - ooh la la!
 

The zipper is in a cool funky place and and lining is a vivid blue moire that matches the blue
embroidery thread and zipper. 

I

This was digitized using my Janome Digitizer V5 and sewn on my Janome 15000 (Calypso).
Fabric exterior was black canvas duck cloth. I used 40 wt. rayon embroidery threads,
black cutaway stabilizer, a blue Janome needle for embroidery, and a denim needle for the assembly. To ease in the assembly I created a clear 7.5" template and traced it onto the front of the embroidered piece for visual placement. I then basted on the circle and used the backside as a sewing template. I pondered using my circle attachment, but decided to manually align the circle to the design as I like to eyeball the design placement prior to sewing.

Now that I have a short guitar strap, there's nothing stopping me from creating cross body guitar straps, and I think I will just do that - coolie moolie!


Sunday, March 29, 2015

Knitted Poncho, Katniss Cowl Vest, and Cowl Bandana

I am dedicating this post to my daughter-in-law, Sarah. 

Knitters gonna knit, and knit Sarah does well.


I LOVE LOVE LOVE ponchos, shawls and cowls. This shawl is soft, warm and so versatile. Love the pattern and button and neutral tone, it goes with everything even though I wore gray  to simplify the photo session - shout out to the always fabulous Dr. T :-)


Here's the back, just as beautiful as the front.
Coolie moolie!


I can even wear it with the points off center for another look. You could even unbutton it  and wear as a simple shawl, but what's the fun in that?

I picked up the pattern at my local knitting store, but you can always order from someone on the web - Blue Sky Alpacas Techno Sasha Wrap


Here's the adorable cowl that Sarah whipped up - pls ignore the uggo selfie :-(


Love it ! Perfect with sweaters, coats or jackets.

Want one of your own? Here's the free pattern -  Bandana Cowl

This is my very FAV - my Katniss vest. I LOVE hunger games. When I first laid eyes on this unique knitted wonder in the movie I knew I had to have it. Sarah was so willing to try something new and did an AWESOME job! I love sashaying around the mall and watching people's reactions. Several recognize it and mention the Hunger Games. My response - the Katniss salute of course!


The back is just as unique.  I do wear it without the leather jacket and it's just as cute!

I saw several knitted versions for sale on etsy. Sarah was happy to knit one -  I found the pattern on etsy, and the rest is history! Here's the pattern on Ravelry - Katniss Cowl Vest


Of course, no photo op is complete without including Diva Coco. As usual, we couldn't get her out of the way to take the pics, but she didn't enjoy being held for an actual planned photo. "She who must be obeyed" was finally freed to monitor her kingdom on her own terms.


Sarah's working on some new items, and yes, they aren't gray! I can't wait to see them! Hope these great ideas transform you from potential knit-wits to knitologists! FYI - Sarah is leading the way!

xox
mxm